

Permissions
The Alerts feature has three cumulative permission levels. Manage includes everything in Write, and Write includes everything in Read.- Read: open the alerts management page at Settings > Alerts and view the list of alerts.
- Write: everything Read allows, plus add a preset, edit an alert, attach an alert or preset to a view, and unmute an alert.
- Manage: everything Write allows, plus delete a preset and detach an alert from a view.
Add an Alert to a Single View
Attaching an alert to a view requires the Write permission level. See Permissions.
- Go to Views and select your Alert.
- Click the Alert name and select Attach an Alert.
- Under Build My Own, select View Specific Alert.
- Select Email.
- You can configure presence or absence alerts. Set the alert to Presence.
- For this example, set it to 100 log lines in 15 minutes. As you update the number of log lines and times, the graph will update to show how many lines for that time.
The graph will update reflect your selections, the gray areas show the times you will not receive alerts.
- You can send an alert at the end of 15 minutes, immediately after 100 lines, or set a custom schedule. For this example, we’ll select at the end of 15 minutes.
- Add you email recipients.
- Set the timezone to send the alerts.
Congratulations. You’ve set an alert, for the 404 View. Now you’ll get an alert at the end of 15 minutes if there are 100 or more 404 errors logged.
Create an Alert Template for Views
Preset alerts are templates that can be used on multiple Views. In this example, you’ll create a custom schedule for alerts that only notifies those on call Monday, Wednesday, and Friday from 8:00 AM - 5:00 PM. Then you’ll assign that alert to a view.Create the Preset
Adding a preset requires the Write permission level. See Permissions.
- Go to Settings > Alerts.
- Click Add a Preset.
- Select Email.
- Give the preset a name.
- Set Presence and when 5 log lines appear within 15 minutes.
- Send the alert at the end of 15 minutes.
- Toggle Custom Schedule. When you set a custom schedule, alerts will only be send during that time. If your app alerts outside of that time, you will not receive an alert.
- Select Monday, Wednesday, and Friday as the active days.
- Restrict the time to 8:00 AM - 5:00 PM.
As you update the days and time, you’ll notice the graph updating. Areas shaded gray will not send alerts during that time.
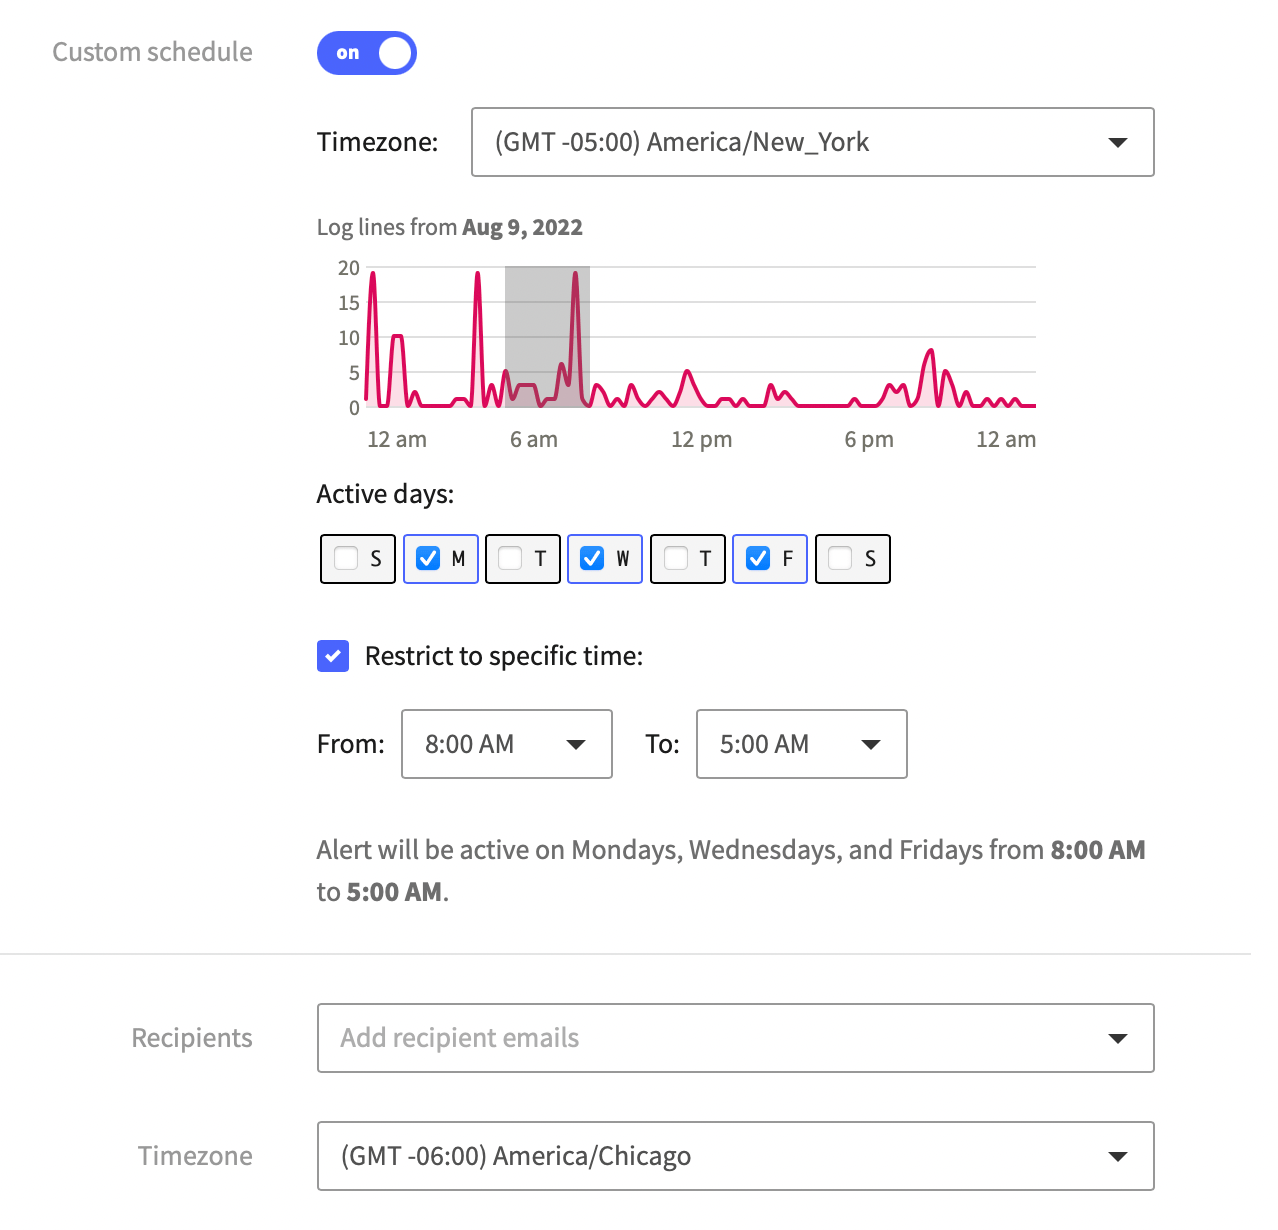
A custom alert schedule showing Monday, Wednesday, and Friday from 8:00 AM - 5:00
Assign Preset to a View
Attaching a preset to a view requires the Write permission level. See Permissions.
- Go to Views.
- Select the View you want to add the alert to.
- Click the View name in the Viewer, then attach alert.
- Search for the alert name.